
Force The User, Luke
In our previous post, we’ve set up everything so we’d be able to start creating the users and their respective mailboxes.
If at this point you’ve already changed the mail server name in the domain’s MX record to that of the Office 365 one, remember that actual mail might already be arriving (or bouncing) in the O365 environment, so be cautious of this, when migrating a live situation.
A small recap below in case you forgot our intended setup :
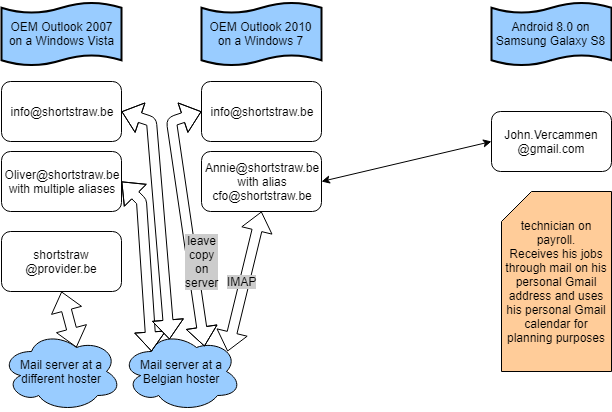
If you’ve been paying attention in the previous posts, you’ll know we will be needing to create three users here :
- Oliver
- Annie
- John
All other mail related stuff will be handled with mail groups or shared boxes.
Remember : the Microsoft licensing system in O365 is user-based, not computer-based.
Let’s start off with creating these three accounts.
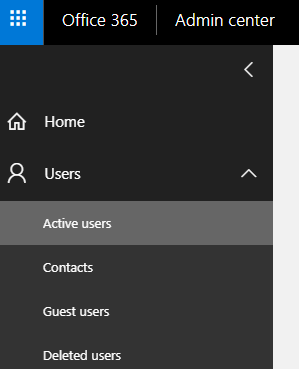
Open the Office 365 admin portal and open the “Users” menu, and then select “Active Users”.
Next, Click the “+ Add a user” button and a small form appears.
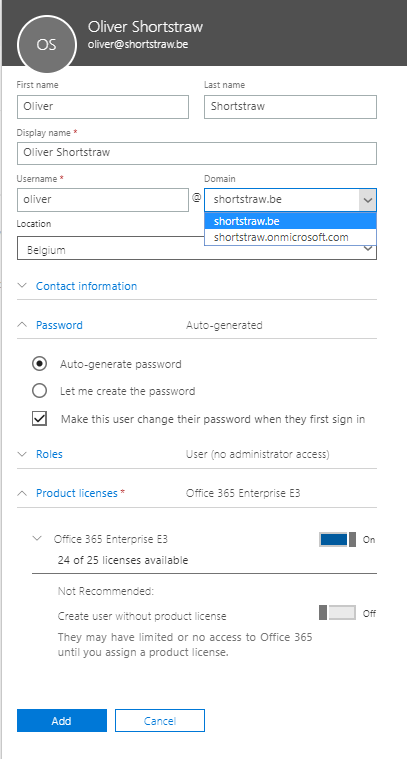
You’ll notice a couple of things in the user creation form (except from the obvious things of course) :
- The domain field shows your recently added domain as well as the onmicrosoft.com tenant name.
This means that you’re not obliged to actually use a domain name in an O365 environment. When going for mailboxes, it’d be stupid/silly/… not to do so. - Password generation : either let Microsoft generate a password for you that complies with the O365 password policies or type one for yourself.
You can also allow the user to be able to change their password on first logon.
Make your choice depending on the end-customer’s needs.
After confirming the user creation, you’ll also be given the option to send the credentials to an email address of your choice. - Roles : by default, new users will be given the “User” role, which allows for basic usage of the O365 environment. Other roles can be “Global administrator” or a custom mix of rights.
For more info on the different types of admin rights, see this Microsoft page.
If you’re ever to go and do a Microsoft exam on O365, these roles will pop up more than once in the questions list.
The Roles parts also allows you to fill in an alternative email address, instead of the user having to do this. Purely intended for password retrieval purposes. - Product licenses : in the O365 demo you’ll be given 25 Enterprise E3 licenses.
Depending on your user’s needs, provide the correct licenses by clicking the slider next to the license name.
Creating an user without a product license, which is also an option, is ill-advised and used in only a few specific situations.
Click the “Add” button and you’ll be greeted with the send-password screen asking you if you need to send the password in case you forget to write it down.
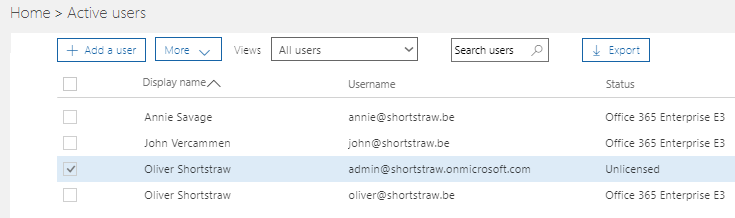
Repeat for all the necessary users.
In this case Annie and John will be created in the same way.
Remember to remove the admin’s E3 license for good measure. (but keep him admin !!)
In this demo environment, it doesn’t really matter, but you don’t want your customer to be paying for an unused license.
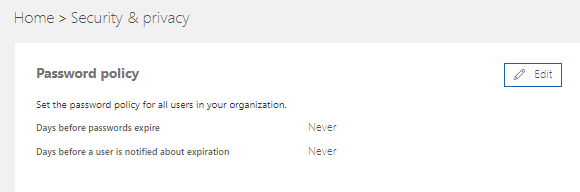
Just a tiny heads-up : if you don’t want your users to be calling you every 90 days, you might want to perform the small task of changing the Password policy.
Go to Settings > Security and Privacy and change password policy to “Never expire” and “Never notify” by clicking the “Edit” button.
The spice must flow. So must the mail
Well, that didn’t seem so difficult, right ?
Office 365 has automatically created a mailbox already for your users, in the background.
The system knid of predicted that you’d be wanting a mailbox for your E3-licensed users, as otherwise it wouldn’t be logic that you’d provided them with such a license.
Of course there’s still some things that need to be done, so let’s have a look there.
There are two ways to edit mailbox properties.
The easiest, but with the least fancy options is through the same “User” menu we used to create the users themselves.
The second option is through the Exchange Admin Center.
Let’s start with “easy mode” :
Click the user in the Active Users menu and his properties will appear in an overview.
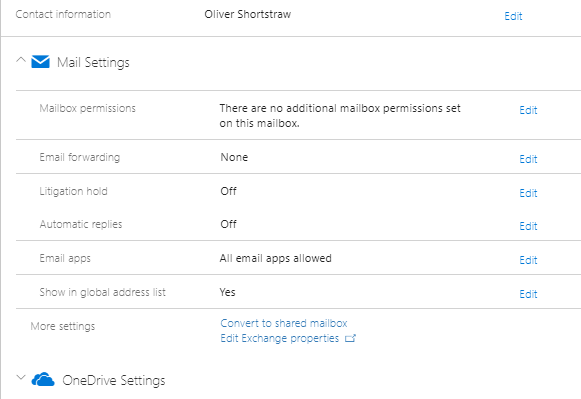
One of the options visible will be “Mail Settings”, where you can set up a couple of things :
- Mailbox permissions : literally what it says. Allow others to have specific access to this mailbox. We’ll get into more detail when we reach a shared mailbox.
- Email forwarding : allows you to *drumrolls* forward your user’s mail to another mailbox, with the option of leaving the original mails in your O365 box.
External mailboxes (unrelated to your O365 tenant) are also possible recipients. - Litigation Hold : allows for items in the mailbox to be retained even if the user deletes them.
Pay attention that this can increase the size of your mailbox significantly.
More info on litigation can be found on this Technet article. - Automatic replies : I don’t believe this needs much explaining.
Can also be done through the user’s personal settings in either Outlook or throught https://outlook.office365.com and preferably so. If you need to manage all your customers’ mailboxes and set their Out of Office message yourself, you’d best be charging by the hour. - Email apps will provide you the option of disabling certani ways of connecting to the O365 mail system. I can imaging you might want to disable POP ad IMAP for instance. It depends on the specific needs, however.
- Show in global address list sets visibility of this mailbox in the address list when browsing through your company contacts. Usually you’d want this setting to remain untouched. Only in certain cases (for instance a logging or journaling mailbox) will this be a good choice.
- Converto to a shared mailbox basically unlinks the mailbox from a user license and changes it to an mailbox which is only visible through an other O365 account within your tenant.
- Edit Exchange properties opens the “hard mode” Exchange Admin Center screen, which we’ll discuss in more detail next.
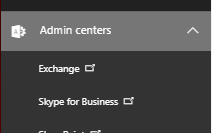 The Exchange Admin Center is actually the way to go when you want to configure your mail environment in more detail.
It’s also a lot more fun to fiddle around in and it will give you a more general idea on all the mailbox features.
For all on-premise Exchange server admins with experience in 2013 server or higher : you’re in for a treat as this is an almost-perfect copy of the “Exchange Control Panel” with just a tiny difference in some functionality. You can probably skip most of this part.
Even the URL is similar : https://outlook.office365.com/ecp/
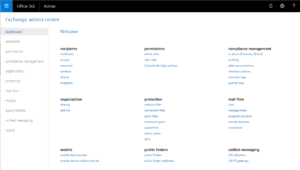
Don’t be startled by the amount of clickable options in the Exchange admin Center.
We’ll cover the basics, under the “recipients” section.
Have a look around in the other options, but don’t change anything for now.
For your ease, click the Recipients link in the left menu.
This will show us six options in the top menu :
- Mailboxes : an advanced view per mailbox for setting up rights, mailflow, aliases, …
- Groups : allows for creation of either a fixed ditribution group, a security group or a dynamic distribution group. The dynamic groups are actually quite fun to play around with. They set up a mail-enable group depending on certain variables such as company name, department, …
- Resources are practically identical to shared mailboxes, with the difference that they have a fancy looking icon. Resource mailboxes have the purpose of creating a mailbox (more preferrably a calendar) for your hardware.
If Oliver Shortstraw has a meeting room and a shared car, he might benefit from giving these items a calendar of their own (it’s free, anyway) so managing whoever needs to borrow the car or use the meeting room becomes a super-easy task. - Contacts : if you were to use external email addresses in tenant-wide mail rules, they need to be defined in this area.
“Mail contacts” are used for administrative purposes only.
“Mail users” are Active Directory enabled objects linked to an external mail address, allowing external users (like a gmail user) to perform things inside your cloud AD environment. - Shared mailboxes : as mentioned before, these mailboxes host mail, but aren’t linked to a physical user, thus not accounted for during licensing cost calculation.
- Migration. I’ve always found this option to be somewhat misplaced in the recipients menu.
The “Migration” option oviously lets you migrate to (and from !) Exchange Online through a couple of ways.
We’ll be doing the second-to-easiest migration later on, as we’ll be importing shortstraw.be mail from the current provider over an IMAP migration.
In case you’re wondering : importing PST files in Outlook is the easiest way.
Mailbox properties
Let’s start alphabetically and have a look at Annie’s mailbox.
Doubleclick her entry in the Mailboxes part of the Exchange Admin Center
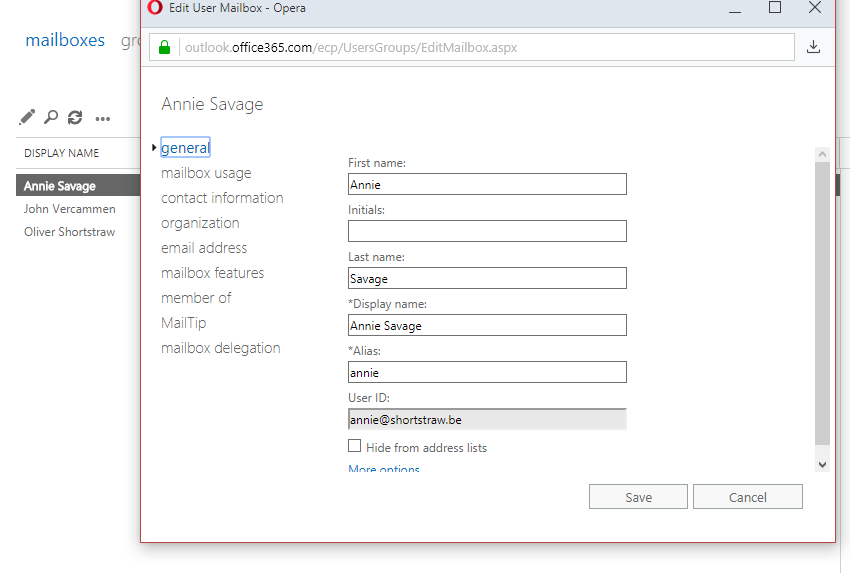
The more important options in this popup window (allow popups in your browser for this to work, by the way) aren’t the ones you see at first.
Except from the “hide from address list” check mark, you can safely move on the “email address” menu for now. Feel free to have a gander at the other options.
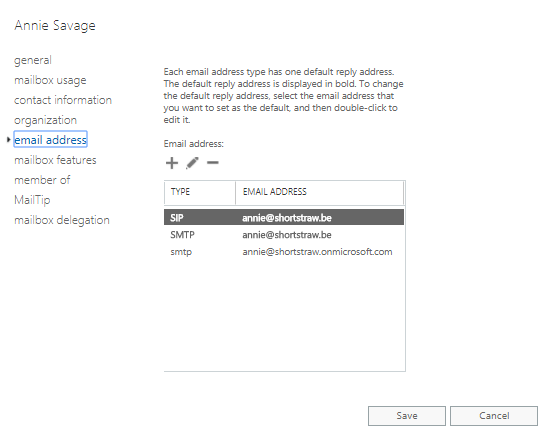
You’ll see three entries by default, after having created a user with only one domain attached to the O365 tenant :
- SIP : used in Lync/Skype for Business/Teams (the communication part)
- SMTP (in uppercase) : the default address, by which all outgoing mail from this mailbox is sent. Also called the “reply address”
- smtp (in lowercase) : an alias to the mailbox. Mail sent to this address will appear in the mailbox as well. Replies will be sent from the SMTP address.
In our example, we’d like for Annie to receive cfo@shortstraw.be as well.
This can be easily achieved by clicking the little + icon and filling out the form, where you type the complete e-mail address and pressing the “Save” button.
You can edit here if this new address needs to become the reply address.
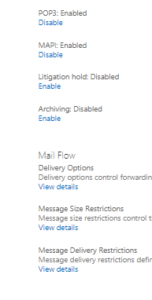
Mailbox features holds a plethora of options such as disabling the use webmail, denying mobile phone connectivity, litigation (see above), archiving, …
The part I want to focus on is “Mail flow” (scroll down a little in the list or enlarge the window).
Again, feel free to check out the other options as well.
Click mail flow and a new window will appear where you get to fill out another form.
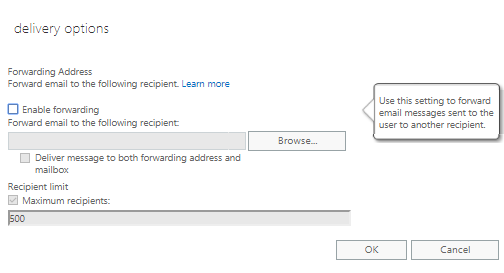
Pretty straightforward option where you can setup a server-side mail forwarding, without Annie knowing about it.
For legal reasons I’m obliged to tell you that you should inform your users of this forwarding rule.
Ticking “Enable forwarding” enables you to click the “Browse” button, which in its turn shows you the list of available users to select from.
You’ll see that this list is populated only by the internal addresses in your own global address list.
And this is where our “Mail contacts” from above come in of oyu’re to setup a forwarding to an address that’s not housed in your customer’s O365 tenant.
“Deliver message to both forwarding addresses and mailbox” simply does what it says. If you weren’t to activate this after enabling the forward option, Annie wouldn’t receive mails anymore in her own mailbox, but all mails are forwarded without leaving a copy.
One more option in the left menu of our user mailbox properties that we’ll look into within a couple of minutes is the “Mailbox delegation” menu. This option is a mini rights management where you can set “full access”, “send on behalf” and “send as” rights for a mailbox.
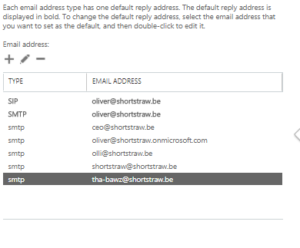 In our example, Oliver had a couple of aliases in his old mail setup.
Because we love our customer, we’ll gladly copy and paste these addresses in the new environment so he can be mailed on e.g. tha-bawz@shortstraw.be
Our third “straw” is John, who luckily doesn’t need extras so he’s good to go with an out-of-the-box setup, which starts him up automatically as john@shortstraw.be
We’re almost done with our basic mailflow configuration.
All that remains from our initial analysis (concerning the shortstraw.be domain name) is the remaining info@shortstraw.be that needed to be seen by both Annie and Oliver.
We’ve already established that a shared mailbox would be the most appropriate solution for this, so let’s configure one !
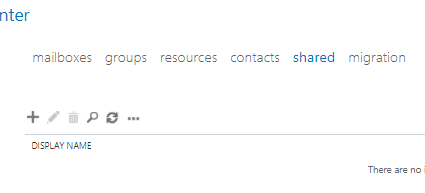
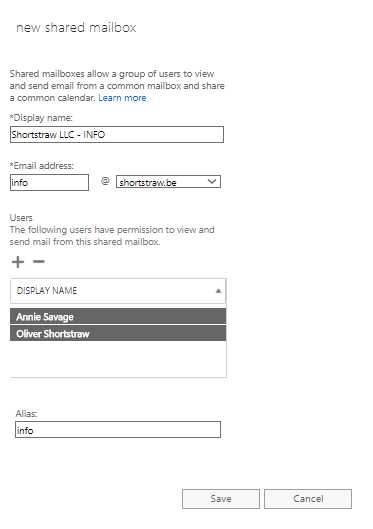
Go to the “shared” top menu and click the little + icon.
A familiar looking form appears.
You might recognize this from when you just recently created a new mailbox.
The biggest difference is the appearance of the permissions box.
Select the user(s) with permission to view and send from this box and press “Save”.
You’re good to go !
Setting up a shared mailbox is THAT easy.
That’s it !

You’ve got a basic mail configuration up and running.
If you’ve changed the DNS settings for the MX record as discussed in the previous migration post, you should be receiving mail by now.
If you’ve set up this mail config as a placeholder for when the actual migration starts, it’s time to move on to the migration now.
THAT’S RIGHT !! YOU GET TO ACTUALLY MIGRATE AFTER 5 CONSECUTIVE POSTS CLAIMING SO.
All jokes aside, in my humble opinion the prep work is incredibly important in deciding between keeping or losing your customer.
And that’s a decision from both the customer and the IT guy/girl !