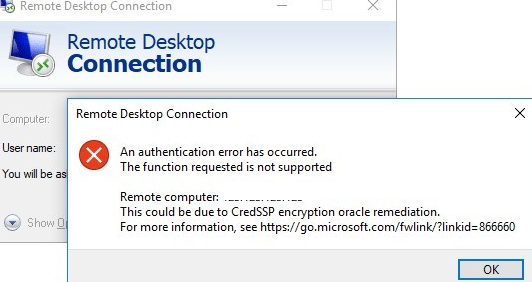
Microsoft has patched a security thingie, recently on all recent server OS’es.
Every good citizen, using the default Remote Desktop software, has a big chance to be screwed.
You’ve just imported somebody’s mailbox in a lovely new Office 365 or local Microsoft Exchange Server, coming from a somewhat older system running on IMAP or an other cool 80’s-90’s e-mail protocol.
After struggling with all the necessary issues you run into (getting rid of Mozilla Thunderbird, convincing the local Linux user that he should indeed run Windows for him to receive proper support from you, updating everything to the latest released patches, …), you finally get a version of Outlook up and running, with all mails, calendar and contacts.
Also, don’t forget your auto-complete list ! (NO THIS ISN’T YOUR ADDRESS BOOK)
WHEN SUDDENLY one of the following complaints come your way :
I can’t delete a certain folder in my Outlook !
One or more of my folders is empty, even though it says “xxx number of items in this folder” !
What is “FILTER APPLIED” on the bottom bar of my freshly installed Outlook and why can’t I reset my “Views” in the “Change View” menu ?
…
In this specific case, after a copy or import from an IMAP mailbox, there’ s a huge possibility that the properties of your folder that houses these mail messages is set to something faulty.
In most of these cases, it’s the so-called Container Class that still thinks that we’re working in an IMAP folder instead of a regular “Note” folder. (I didn’t invent the name)
Solving the actual problem
Before we start, I’d like to add a little disclaimer here, saying you can seriously mess up your mail folders if you just fiddle around without knowing what you’re doing in the software we’ll be using.
Download the version corresponding to your OFFICE VERSION (not your Windows version), 32 or 64 bit, unpack the zipfile and run the package.
Go to Session > Logon
Select your Outlook profile (if any)
Double-click the data store (possibly just one, depending on the rights you have to other mailboxes or extra added PST files)
Expand Root – Mailbox (or whatever it’s called in your Office installed language)
Expand the Top of Information Store or the IPM_Subtree folder
Select Inbox (language-specific name) and browse to the folder containing the problem
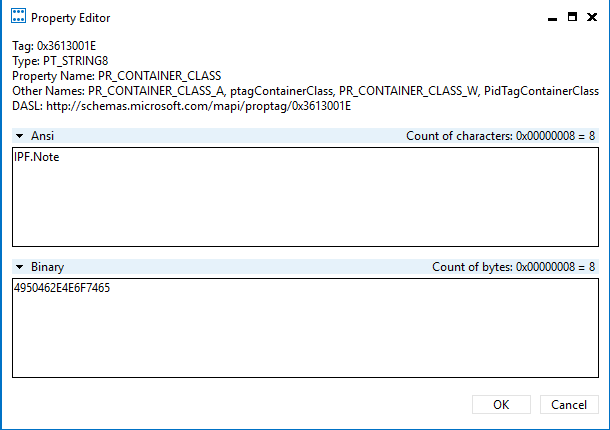
Doubleclick PR_CONTAINER_CLASS in the right column and change the value in the ANSI field to IPF.Note.
If my predections were correct, it used to say IPF.IMAP.
If this is not the case, stop what you’re doing and roll back your changes, as there’s a different issue.
You didn’t think I was going to let you start a migration process without making you read the detailed “how and why”, did you ?
There’s a couple of migration types to keep in mind, where one is easier than the other.
Usually the more difficult one is also the most interesting one, but even this is dependant on specific needs.
Remote move migration
Staged migration
Cutover migration
IMAP migration
PST import
The last one (PST) is in most cases forgotten as an official way, since it’s possibly way too simple in Microsoft’s eyes.
As the target audience for this specific blog post is the average Belgian SME with an average of 5 to 20 employees, I’ll stick to the basics in this post.
An other post will cover the heavier subjects in a nearby future (aka ‘when I feel like it’)
PST Migration (1)
Difficulty level
Microsoft has this pretty cool tool to either upload PST files to a temporary Azure storage or to actually send them a physical copy by mail (yes, snailmail)
It’s a bit out of the scope of our average situation here, but know that such a method exists.
It will require the use of the program AZCopy, which is well explained in the link above.
Check it out if you want to look like a cool IT guy in the eyes of your customer 😉
(although Powershell is still the way to go if you really want to impress your customer)
PST Migration (2)
Difficulty level
Being a ton easier and providing more oversight than the PST Migration above, the ‘basic’ PST migration will have the average end-user require/demand your presence more often.
Although remote tools like Teamviewer/LogMeIn/… have made the life of the IT’er a lot easier, there’s got to be a bit of physical contact every now and then. This type of migration will give you the opportunity to sit down and explain Office 365 to your users while the data is slowly uploading through MS Outlook.
Grab some coffee and get your hands dirty as this type of migration will get you closest to the actual customer’s computer than any other.
Try to avoid using this migration type, when the customer has an IMAP mail account you need to move to your O365 tenant, as often IMAP saves the mail headers, but not the mail an sich, resulting in a very empty mailbox in the end.
Now, how does this process work ?
Pretty easy :
First of all, get your mail users to stop using their mail for a while.
Preferably redirect the mailflow, by use of the MX record we talked about in this post, already 24 hours before starting your PST import, to make sure no trailing mail gets left behind on a mail server you won’t be able to access anymore after migrating.
If you’re really sure that the mail is good to go, the easiest way would be to locate the current location of the PST files. https://www.msoutlook.info/question/827 explains this quite well.
Keep in mind that the PST files aren’t always in their default location. Some customer prefer to save their PST files on a network location or redirected folder.
If you happen to be the IT guy that implemented this specific setup, shame on you. PST files will get corrupted by just looking at them. Placing them in a network drive, will only make things worse.
No PST file found ? No problem !
There’s a possibility that your user has disabled ‘cached mode’ in Outlook (often occurs in cases of local desktop computers in connection with an Exchange Server on that same location)
In that case you’re more likely to find OST files or something similar.
The ‘clean’ way to go here is to start a simple PST export procedure in Outlook
Seeing as reinventing the wheel is not my hobby, here’s the link to the Microsoft article that explains how to do this : https://support.office.com/en-us/article/export-or-backup-email-contacts-and-calendar-to-an-outlook-pst-file-14252b52-3075-4e9b-be4e-ff9ef1068f91
Writing walls of text is one of my hobbies, though ^_^
Once you’ve gotten hold of the PST files, there’s a couple of ways to get them in Office 365, but seeing as I already advised to stop your users from using their email for a while, you get to strike while the iron is still hot.
The easiest way is to create a new Outlook profile.
Mac users : check this out –> https://support.office.com/en-us/article/manage-profiles-or-identities-in-outlook-for-mac-fed2a955-74df-4a24-bef6-78a426958c4c Windows users : Open Control Panel, go to Mail (32 bits or no reference to the number of bits, depending on the version).
Afterwards, click ‘View Profiles’ and add a new one.
The ‘new account‘ wizard starts, where you can simply enter your new mail address (given you’re not migrating from a local Exchange server on your own domain – more on this later)
Outlook will start and an empty mailbox or even a partly filled one will appear. Depending on whether you changed the MX record already or left it unchanged.
Eventually, change the default profile to your new O365 one.
Repeat x times where x is the number of computers where Outlook is running the old mailbox.
IMAP migration
Difficulty level
The difficulty level could vary depending on the version of the IMAP server, but the thought train runs on that same track. (did I just invent a new proverb ?)
First of all, let’s take a look at this schema below, which explains the process of migration quite neatly and in an understandable manner.
Thanks, Microsoft, for this overview.
If you’ve followed our current steps in the previous posts, we’ve already established the steps up to the creation of the mailboxes, which starts us at step 5. isn’t that tidy ?
You need to create a specific CSV file, that we’re going to use in our migration batch.
Usually it will suffice to base yourself on this template, but there are exceptions for Exchange, Dovecot, Mirapoint and couple of weirder ones.
The general idea behind this CSV file is to provide the mailbox address TO which you need to copy the content of the IMAP folder, together with the username and password of the ORIGINAL IMAP mailbox, where the mail is currently residing.
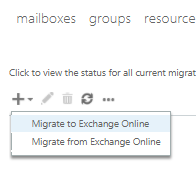
You can start the migration in the O365 Exchange Control Panel, by going to ‘Recipients’ and then clicking ‘Migration’ in the topmenu.
Click the little ‘+‘ and select ‘Migrate to Exchange Online’
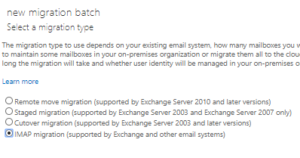
Select ‘IMAP migration’
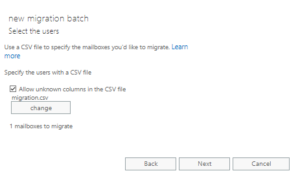
Upload your CSV file and allow unknown columns
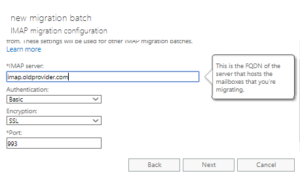
Enter the IMAP server data and means of authentication of your old provider
Pressing ‘Next’ will start the initial setup.
The migration top menu will provide you with more information on how your migration is going. You can click the migration batch and review potential errors or view the overall progress.
A picture’s worth a thousand words, so I’m guessing a Youtube video will be worth at least “De Leeuw van Vlaenderen” :
Every IT related action has a counter-action that results in something going wrong.
Keep Murphy’s laws in mind, especially the computer-based ones.
Oh no! I lost my contacts.
First of all, wear glasses.
Second, they’re not your contacts. They’re your autocomplete list in the to-field
Third, you might have used the global address list instead of your own contact list.
Still found no contacts ? Have you imported from a different folder language of Outlook ? Check ‘all folders‘ and see if you’ve got an other ‘Contacts’ folder somewhere (check for specific Contacts icons)
Also, an IMAP migration does not cover contacts (or calendar or tasks for that matter, import them using the PST method, while excluding mail)
I can’t send an internal mail after the O365 migration.
Actually, you can, but you’re still using the wrong address in the background.
Your to-field might say ‘my_colleague@mydomain.com’, but in the background it’s saved this entry as a unique ID (especially when migrating from your own local mail server).
The solution : delete this user from your address book/autocomplete list and type the address manually.
I didn’t have Outlook before migrating. How can I create this new profile you speak of ?
2 do : tools for migrating from other crappy software
My PST file will not import (/partly).
Most common reason is a corrupt PST file. Fix it using the scanPST tool.
Corruption can happen if you save your PST file on a network drive or if a specific mail is being a d*ck. ScanPST will solve this.
An often overlooked reason could also be not having enough space in your new O365 mailbox. In this case you might have to upgrade the O365 subscription for this specific user with extra space or clean up the mailbox before doing the export to a PST file.
Very big mails don’t get IMAP-migrated.
This is normal. IMAP migration supports email size up to 35MB/mail
I had a sh*tload of mails in my old IMAP folder and now some of them are missing.
If you had over 500.000 mails in your old IMAP box, this is bound to happen as number of maximum items you can migrate in one batch is limited to 500.000
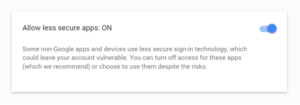
Migrating from Google to O365 is constantly failing. What am I doing wrong ?
You haven’t google’d enough.
No, seriously, there’ s a security setting you must turn on in your Google Security Settings :
You’ll find this here : https://myaccount.google.com/security?pli=1#signin
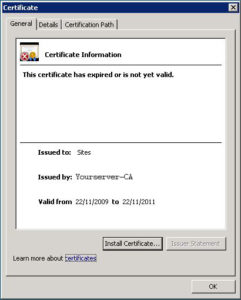
If you’re born before 1990 (and if you’re in IT), you probably grew up with self-signed certificates.
They give you a lovely fake feeling of security, but more than that, they will give users and the IT department horrible stress to configure.
In “days of olde” (early 2000’s), an Exchange server was able to run over http traffic and a certificate was absolutely not required.
Times have changed and so have security protocols. It’s ill-advised to use a self-signed certificate nowadays, as it is equally ill-advised to use a .local domain anymore on your domain controller.
That being said, there’s a couple of ways to fix an expired self-signed certificate on a Windows SBS server. (read first, perform later, you’ll see why)
Lazy mode
aka ‘fix my network’
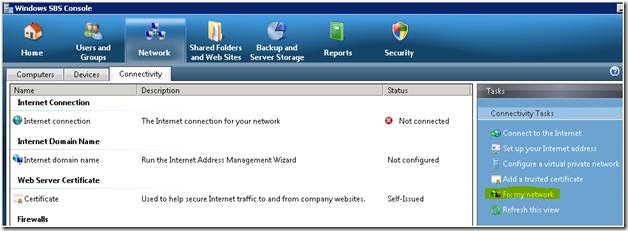
Open the SBS console, go to the ‘network’ menu and select the ‘Connectivity’ tab.
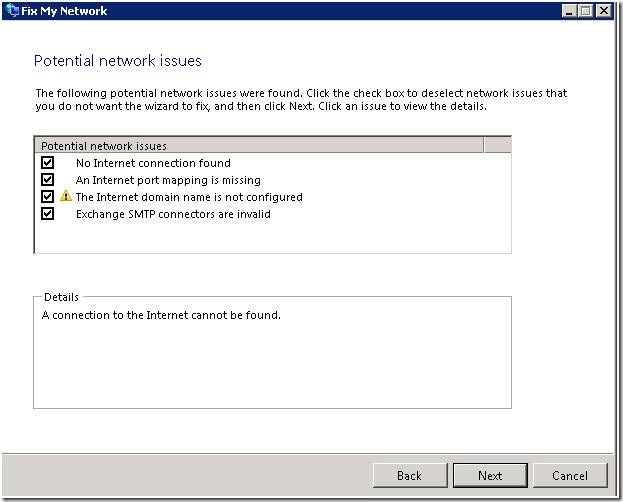
Click ‘Fix my network’ and deselect everything except the certificate error, after this wizard stops scanning.
The usual Next-Next-Next will follow and according to Microsoft, you’re good to go.
HOWEVER…
There’s a couple of things that can go wrong here :
Your certificate contains a custom entry referring to a domain name or subdomain name that wasn’t originally added in the SBS wizard.
You’ll need to perform the manual method for renewing a certificate. See below.
Your Exchange webmail (https://your_mail_server_ip/owa/) still gives a certificate error, stating your certificate’s still expired.
Start the ExMngmtnShell (Exchange Management Shell) as Administrator
type Get-ExchangeCertificate to list the installed certificates
Match the certificate to the expired certificate (using subject the name and services) from the Console then copy the associated thumbprint
Type Get-ExchangeCertificate –Thumbprint INSERTTHUMBPRINTHERE | New-ExchangeCertificate | Enble-ExchangeCertificate -services pop,imap,smtp,iis
Type Y to renew the certificate
Restart SBS2008/2011 Console or restart server.
Profit.
Like-a-bawz-mode
Beautifully explained on http://www.petenetlive.com/KB/Article/0000535, so no need to repeat what Pete already wrote.
The main idea here is to use the IIS built-in Certification Authority (certsrv), while manually defining all entries needed in the certificate.
It’s still relatively easy, but requires a lot of steps.
Of all three mentioned methods, this last one is most likely to succeed.

 Before we start, I’d like to add a little disclaimer here, saying you can seriously mess up your mail folders if you just fiddle around without knowing what you’re doing in the software we’ll be using.
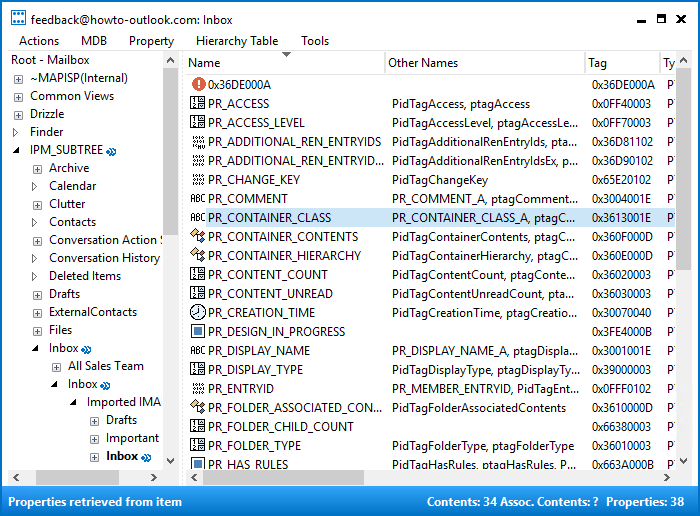
 You didn’t think I was going to let you start a migration process without making you read the detailed “how and why”, did you ?
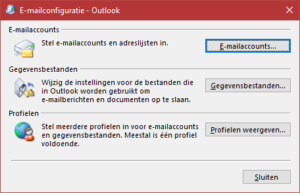 Windows users : Open Control Panel, go to Mail (32 bits or no reference to the number of bits, depending on the version).
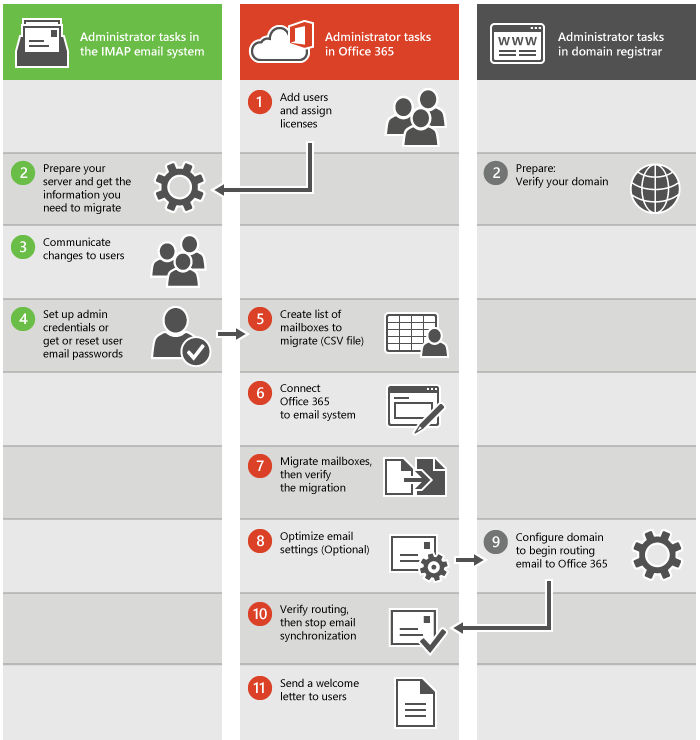
 Beautifully explained on